I got these super comfy moccasins at 579 for $7.80. Then I just
bedazzled the tops of them. I just buy the refills at Wal-Mart for close to $5
and you get A TON of stud’s and rhinestones. You can by the bedazzler for $10 I
don’t find that it works very well and it’s a lot more accurate and you break
less studs if you just do it by hand. All you do is poke the stud or rhinestones
through the top and using a butter knife or bend the pokey things on the back
of it in to secure it. You can use whatever colors you want, whatever pattern
you want, and place them wherever you want.
Saturday, November 19, 2011
Sunday, November 13, 2011
Taking Old Jewelry and Turning It Into New Jewelry
I had gotten a ton of antique clip on earrings that were from
my grandmother and great grandmother. They were beautiful but they hurt my ears
so I couldn’t wear them. So I took them
apart and used them to make a beautiful antique styled bracelet.
I liked the rectangle ones I loved the colors. I noticed they had holes on the sides so I
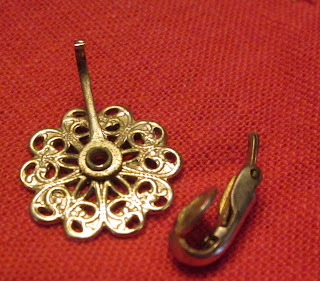
decided to turn them into beads. So I took them apart. Using pliers I took off
the part of the earrings that clip on to your ears. You just wiggle them a
little back and forth and they come right off.
Then I took a pink clip on earring and using wire cutters cut the
wire in between the beads and took them apart. I used the pink beads to make earrings which I will another tutorial on
how to make earrings later.
Again using pliers I took off the part of the earrings that clip on to your ears. Wiggle them a little back and forth and they come right off.
Using the pliers bend the extra metal in towards itself
creating a loop you may have to straighten it out and adjust it a little. The
metal was very flimsy and easy to bend.
Then I took a necklace. Cut the string and took off the
beads.
Using the clip on earing and the beads from the necklace and some other beads laying around and I arranged it how I wanted it.
Then I strung
them with elastic. I strung a piece of elastic through the top left row, strung
it trough a crimping bead, then through on of the holes of the rectangle bead,
then back through the crimping bead and using crimping pliers squeezed it shut.
I repeated this for the second row. I repeated this for the top row of the middle
section and the bottom. Then I repeated it for the top and bottom row of the
right side. Then take the
ends of the top row and square knot them together. Then take the ends of the
bottom row and square knot them together. It is recommended that you put a drop
of glue on the knots to seal them.
Voilà! your finished product is a brand new antique styled bracelet.
Subscribe to:
Posts (Atom)


